Ever wonder how a tiny seed becomes a tall tree or makes all those apples? Dissect a seed to see what’s inside, then watch it grow into its many plant parts.
Age: 7+
Time: 30-60 minutes for Part 1; 10-15 minutes for Part 2
Topics: seeds, plant growth
What you need:
Part 1: Seed Spheres
- 3-4 packages of wildflower seeds
- 3 sheets of construction paper
- Food processor or blender
- Scissors
- Water
- Bowl
- Plate Baking sheet or parchment paper
- Trowel or small shovel
Part 2: Seed Dissection
- Large bean seeds (Lima beans are ideal)
- Water
- Paper
- Pencil
- Magnifying glass
What to do:
Part 1: Seed Spheres
1. Cut or tear the construction paper into about 1-inch squares and place them in a bowl or container.
2. Soak them in water for 20 minutes or more.
3. Use your hands to pull the paper out of the bowl, squeeze out the excess water, and place the paper into a blender or food processor. Ask a grown-up to help you pulse the machine until you have paper pulp.
4. Shake the wildflower seeds onto the plate. Scoop out small amounts of paper pulp and roll them on the plate to cover them with seeds.
5. Roll the balls between your hands until they are about the size of a ping-pong ball.
6. Lay them out on baking sheets or parchment paper to dry (around 24 hours).
7. Finally, plant your colorful seed spheres in pots or dig small holes in your garden and drop in the seeds.
8. Observe your seed spheres to see how long it takes for them to sprout and then flower.
Part 2: Seed dissection
1. Soak half the beans in water for at least three hours before the dissection. Leave the other half dry for comparison.
2. Brainstorm about seeds:
- What are they?
- Do all seeds look the same?
- What do seeds turn into?
- What do seeds need to grow?
3. Remove a soaked bean from the water.
4. Trace the bean twice on your paper so you have two separate bean outlines.
5. In one bean outline, draw what you think will be inside the bean.
6. Peel off the outer skin of the beans (seed coat). What do you think the skin/seed coat does?
7. Carefully pull open the seeds to see what’s inside.
8. Compare the soaked beans to the dry beans. How are they different? How are they similar?
9. Use a magnifying glass to examine the seeds. The baby plant (plant embryo) will likely be the same color as the rest of the bean, but it will have a tiny root and two tiny flattened leaves.
10. Draw what you see inside the bean.
What’s happening?
All living things go through stages of life. Each type of plant and animal has its own life cycle, and the stages vary from species to species.
A common plant life cycle begins when a plant produces a seed. This seed gets buried in the ground, taking in water and nutrients from the soil to grow. The seed grows small roots that push down and out through the soil and shoots that push up through the surface of the soil. The shoots develop into a small seedling with stems or branches with leaves. The seedling grows into a mature plant and develops leaves, flowers, fruits, or nuts that contain seeds.
Seeds remain dormant or inactive until conditions are right for germination. All seeds need water, oxygen, and proper temperature in order to germinate. Some seeds require proper light also. Some germinate better in full light while others require darkness to germinate.
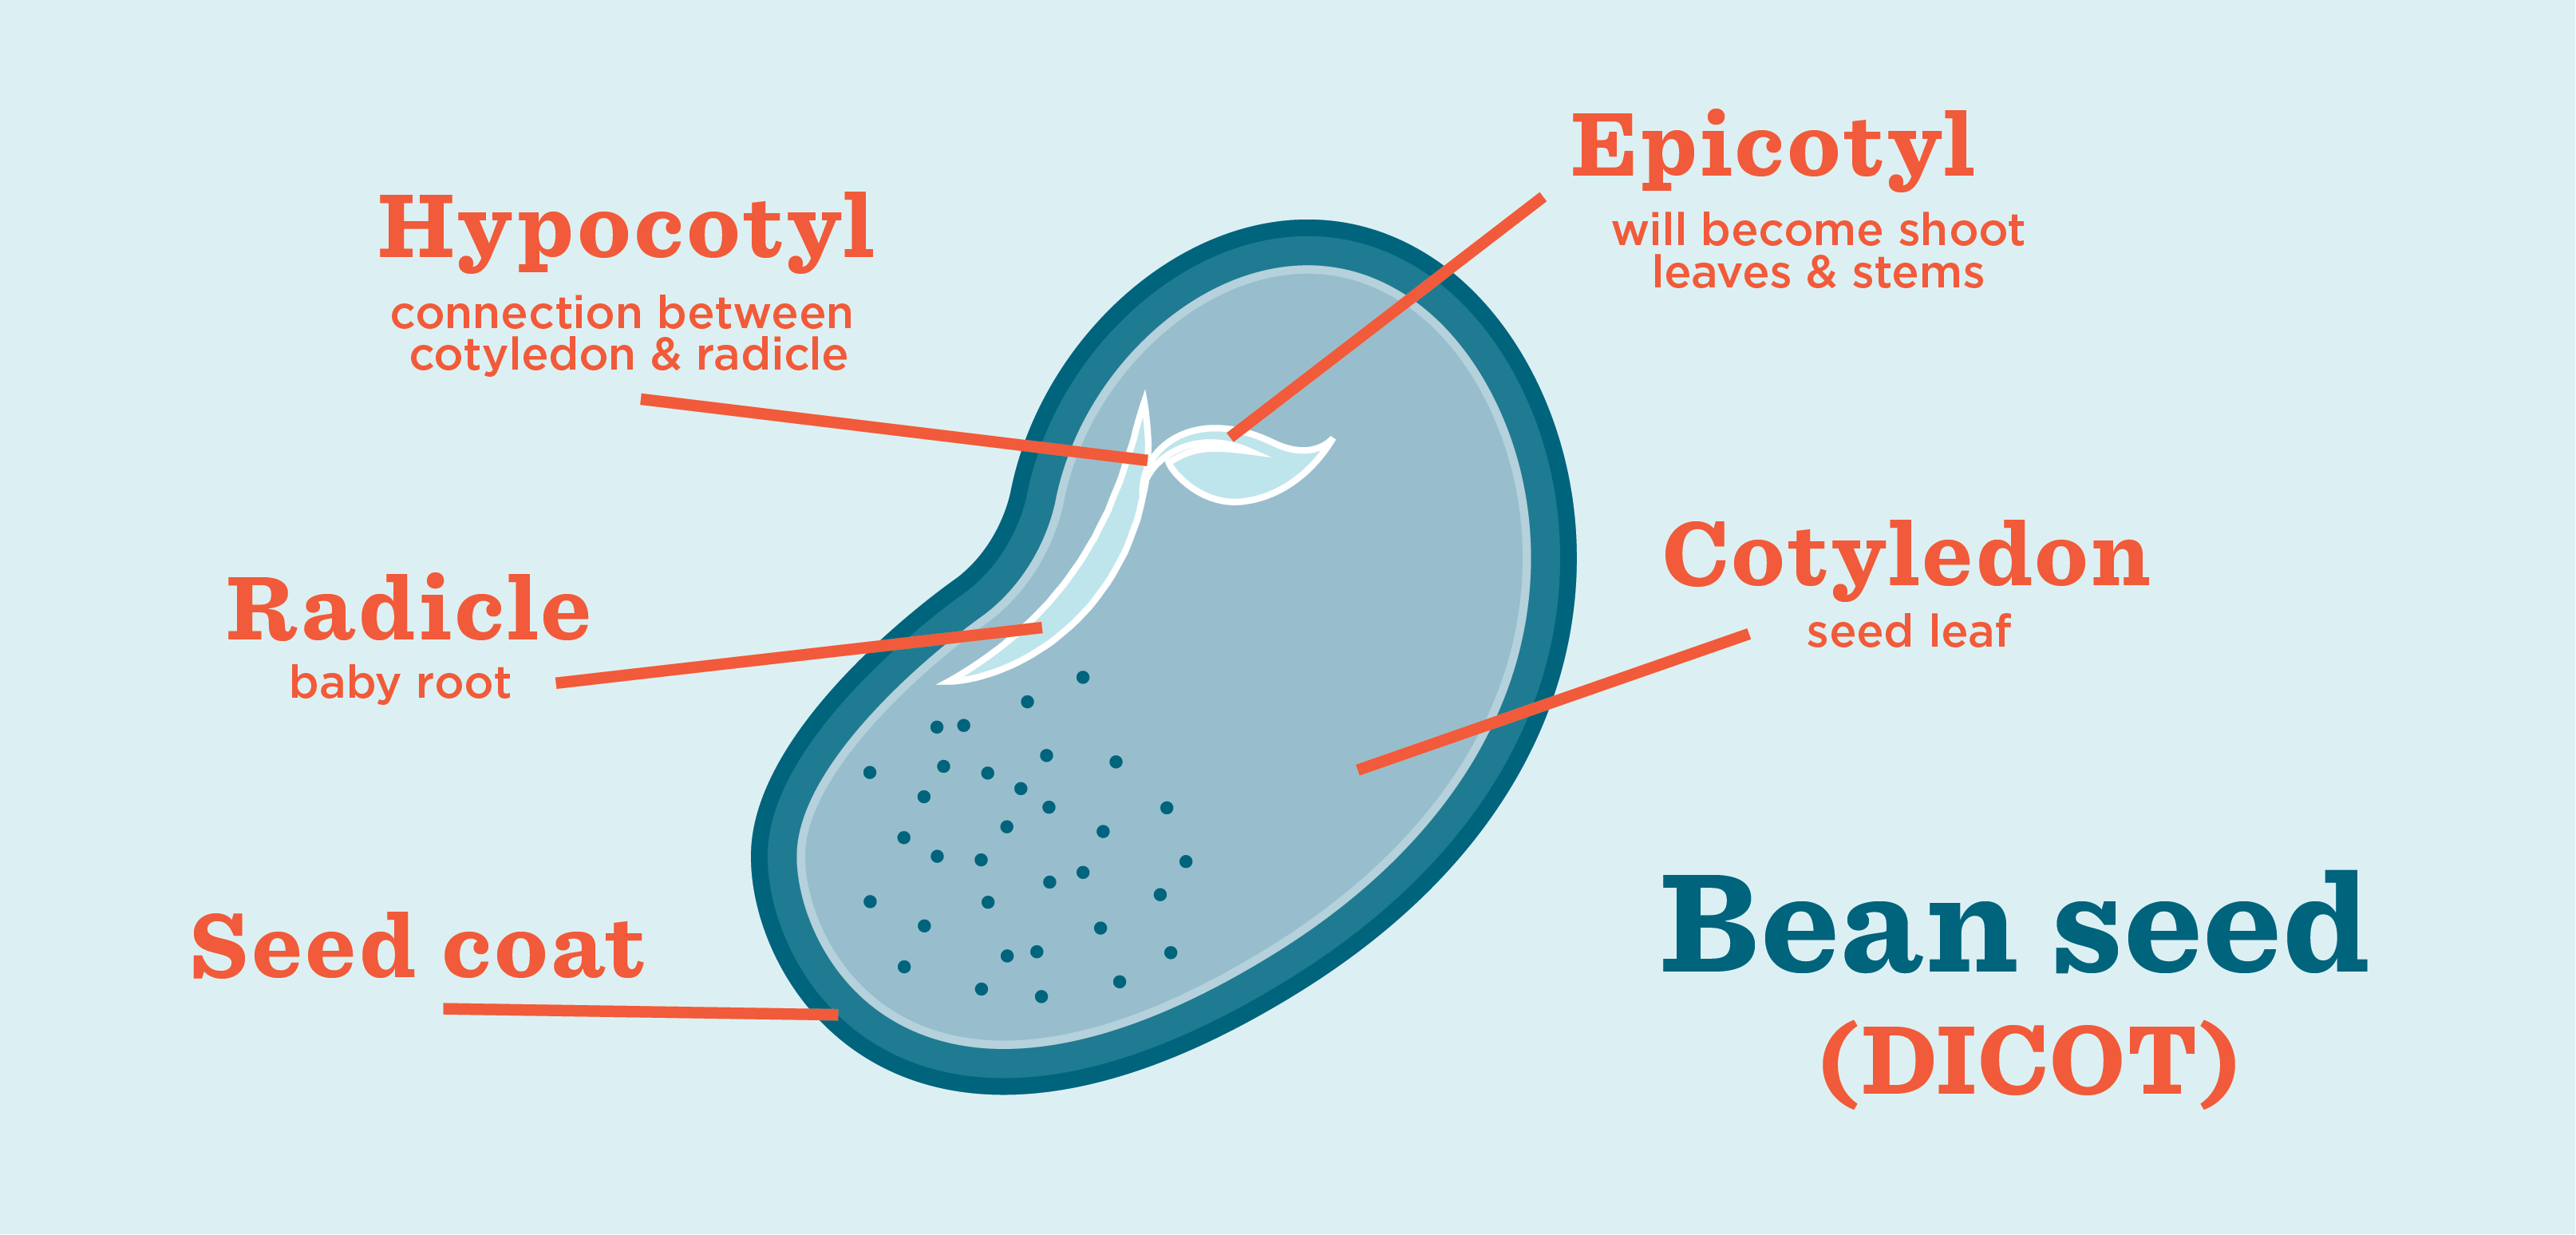
Within a seed is an embryo containing the beginnings of a plant’s leaves, stem, and roots. When a seed is exposed to the proper conditions, water and oxygen are taken in through the seed coat. The embryo's cells start to enlarge. Then the seed coat breaks open and a root, or radicle, emerges first, followed by the shoot, or plumule, that contains the leaves and stem.

Parts of an Embryo:
a) Epicotyl – The tiny shoot of an embryo, from which the entire shoot system develops. The tip of the epicotyl is called the plumule.
b) Hypocotyl – The stage of transition for the growing shoot and root of the embryo
c) Radicle – The tiny root of the embryo
d) Cotyledons – The leaves of the embryo that provide nourishment to the developing plant. Flowering plants are divided into two categories based on their cotyledons: monocotyledonous, or monocots, which have an embryo with one cotyledon, and dicotyledonous, or dicots, which have an embryo with two cotyledons.
This Science Recipe is sponsored by Temple University. The Ambler Arboretum of Temple University is an educational resource modeling the art and science of horticulture and environmental responsibility while fostering research, celebrating the achievements of women in horticulture, preserving the historic significance of the campus and highlighting the health benefits of nature, plants and gardening. The Ambler Arboretum of Temple University is proud to be a part of America’s Garden Capital. Visit arboretum.temple.edu to learn more.

